Unlocking Wild Yeast Fermentation: From Starter to Delicous Loaf
The magical process of turning flour and water into a fragrant, delicious loaf of sourdough bread is a journey rooted in nature, tradition, and precision. Utilizing wild yeast fermentation, homemade sourdough not only provides mouth-watering results but also connects us to a time-honored baking craft. Welcome to "My Sourdough Life," where we unlock the secrets of transforming simple ingredients into artisan bread.
The Heart of Sourdough: The Starter
Creating a sourdough starter is the first step in homemade sourdough baking. Unlike commercial yeast, a sourdough starter is a natural blend of wild yeast and bacteria, primarily lactobacilli, which ferments the dough. This fermentation process gives sourdough its distinct tangy flavor and chewy texture.
How to Create a Sourdough Starter
To begin, mix equal parts flour and water (about 50 grams each) in a sanitized jar. Leave it uncovered for about 24 hours at room temperature to allow wild yeast and bacteria to populate. Each day, discard half of the mixture and feed it with fresh flour and water. This process, called feeding, continues for about a week until your starter is bubbly and active.
Feeding and Maintenance
Learning how to feed a sourdough starter is integral to maintaining it. An ideal sourdough starter feeding schedule involves feeding every 12 to 24 hours, depending on the ambient temperature and your baking plans. On non-baking days, you can store the starter in the fridge and feed it weekly.
Storing Your Sourdough Starter
Proper storage is key to keeping your starter healthy. If you're not baking frequently, store your starter in the fridge and feed it once a week. When you're ready to bake, bring it to room temperature and resume its feeding schedule a few days prior.
Wild Yeast Fermentation: The Science Behind the Craft
Sourdough fermentation hinges on wild yeast, differing from commercial yeast in its diversity and robustness. This makes sourdough bread a staple in "slow food" culinary practices. The prolonged fermentation helps break down gluten, which can make sourdough easier to digest for some people, including diabetics.
Sourdough vs. Commercial Yeast
While both yeasts serve the purpose of leavening, sourdough starters offer deeper flavors and improved shelf-life due to wild yeast fermentation. These natural yeasts thrive alongside lactic acid bacteria, creating a symbiotic relationship that enhances flavor complexity and texture.
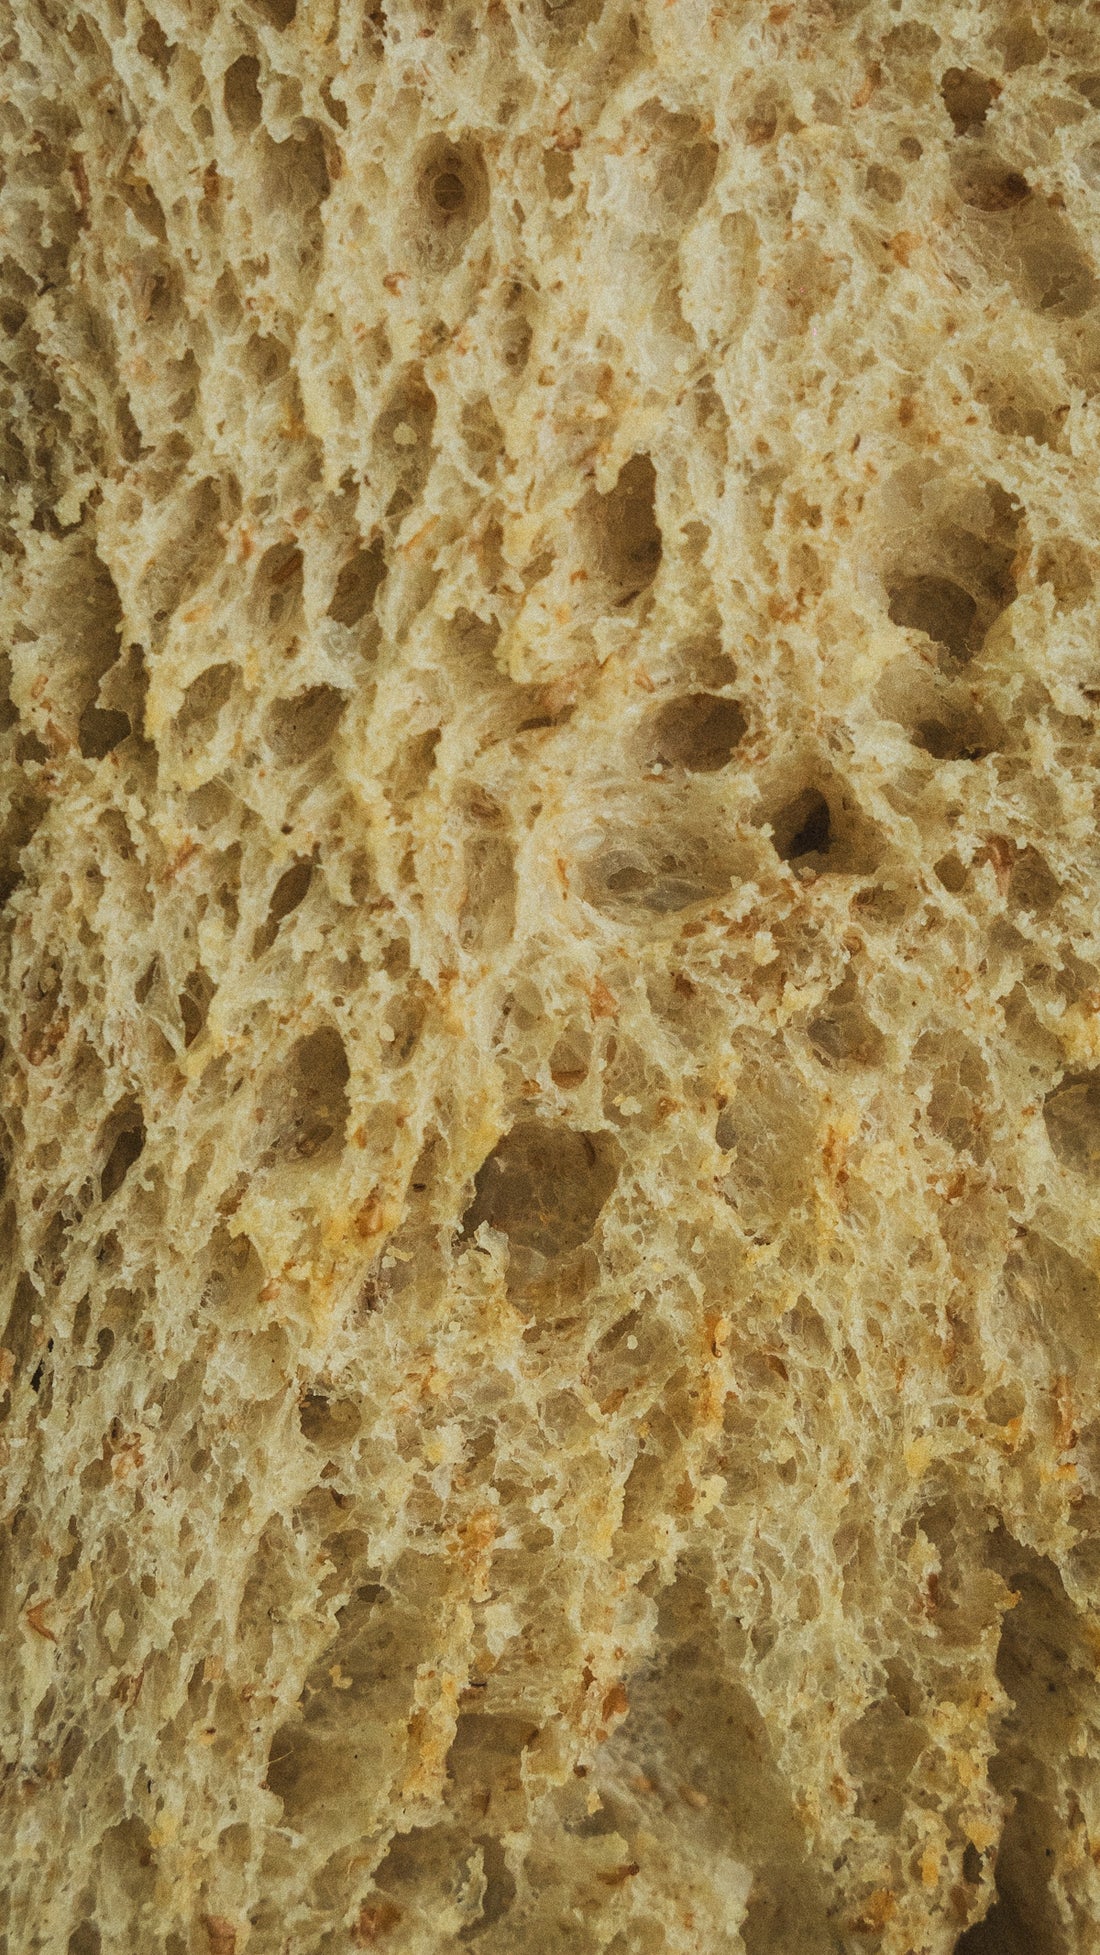
Artisan Bread Baking: From Dough to Loaf
The art of sourdough baking is as much about technique as it is about patience. Let's explore how to bake sourdough bread, from mixing to baking.
Sourdough Bread Recipe
Ingredients:
- 100g active sourdough starter
- 375g water
- 500g bread flour
- 10g salt
Instructions:
- Autolyse: Mix the water and the flour. Let the mixture rest for about 45 minutes.
- Mix: Add the sourdough starter and salt to the autolysed dough. Knead until combined.
- Bulk Fermentation: Leave the dough to rise at room temperature for 4-6 hours, folding it every 30 minutes during the first 2 hours.
- Shaping: Shape the dough into a loaf. Here's an essential guide on how to shape sourdough bread. Aim for a tight skin for better oven spring.
- Proofing: Place the shaped loaf into a banneton or bowl lined with a floured towel. Let it proof in the fridge for 12-24 hours.
- Baking: Preheat your oven and an enameled cast iron Dutch oven (such as the Martha Stewart 7Qt Enameled Cast Iron Dutch Oven) to 250°C. Transfer your loaf into the Dutch oven, score using a dough scoring knife, and bake covered for 20 minutes, then uncovered for another 25 minutes until golden brown.
Sourdough Baking Tips and Troubleshooting
Embarking on the sourdough journey may present a few hurdles. Here are some sourdough starter troubleshooting and bread troubleshooting tips to maintain your sourdough life:
Common Issues:
- Inactive Starter: If your starter isn't bubbling, consider adjusting its feeding schedule and ensure it's kept in a warm area.
- Dense Loaf: Over-proofing or under-proofing can lead to dense bread. Ensure your dough rises adequately but doesn't over-expand.
- Flat Loaf: Poor gluten development might result in a flat loaf. Knead well and handle the dough with care during shaping.
Best Scoring Techniques
Scoring your bread allows gases to escape during baking, encouraging an even rise. Use a sharp scoring knife like the Wooden Handle Bread With 5 Blades Lame Dough Scoring. Practice different patterns to personalize your loaf.
Sourdough for Health and Comfort
Sourdough's extended fermentation process may decrease the glycemic index, potentially making it beneficial for diabetics when consumed moderately. It is also cherished for its rich flavor and satisfying nature—comfort food at its finest.
Perfect Your Craft with the Right Tools
Take your sourdough baking to the next level with essential tools that enhance the process—from starters to loaf pans:
- The Professional Baking Tools 24 Oz Sourdough Starter Jar Pastry Mat Scraper Bread Slicing Knife Gloves for Home DIY Baking Kit ensures you have everything you need in one kit.
- Shape and bake your sourdough in the Nonna Bella Carbon Steel Bread & Loaf Pans for professional results.
Embark on your sourdough journey, explore how rewarding and enriching homemade sourdough baking can be. For more inspiration and guidance, visit Italian Sourdough and dive into the delicious world of artisan bread baking.