Uncovering the Secrets of Wild Yeast Fermentation: A Deep Dive into Homemade Sourdough
Sourdough has taken the world by storm, and for good reason. With its tangy flavor, chewy texture, and a gorgeous crust, it's hard not to love this time-honored bread. Unlike regular bread, sourdough doesn't rely on commercial yeast. Instead, it harnesses the power of a naturally occurring mixture — a mix of flour, water, and wild yeast known as a sourdough starter. Curious about how to bring this magic into your homemade kitchen? Let’s dive into the enthralling world of sourdough fermentation and explore some delightful tips and recipes.
What is a Sourdough Starter?
A sourdough starter is a living culture of flour and water that captures wild yeast from the environment. When properly cared for, it can be used endlessly to bake beautiful bread. Starting your own sourdough starter can seem daunting, but with a bit of patience and knowledge, anyone can cultivate this living mixture.
To give your sourdough starter a historical touch, consider the Nonna Bella Dehydrated Sourdough Starter, a Tuscan heritage culture originating from the 1800s. This starter brings the taste of Italy directly to your kitchen.
The Journey of Homemade Sourdough
Embracing wild yeast fermentation not only advances your artisan bread baking skills but also offers a deeper connection to the food you craft. A sourdough starter requires feeding and maintenance; the process of caring for it is somewhat akin to nurturing a tiny sourdough life.
Feeding Your Sourdough Starter: Schedule and Tips
Understanding how to feed your sourdough starter is crucial for its health. Typically, feeding involves discarding part of the starter and replenishing it with fresh flour and water. This encourages the wild yeast to remain active.
Sourdough Starter Feeding Schedule (if starting with Nonna Bella Dehydrated Sourdough Starter, follow the instructions to rehydrate first, then begin your Sourdough Journey:
- Stage 1: Feed every 12 hours for a robust, bubbly starter. Once your starter is doubling within 4 hours, you are ready to move to stage 2.
- Stage 2: Once matured, feed based on usage—either daily or weekly if refrigerated.
- Stage 3: If you are going to bake every day, keep feeding daily. If you are an infrequent baker, feed the starter before storing it in the refrigerator. When you are ready to bake, start at Stage 1.
- Stage 4: If your starter forms a dark liquid on top, don't panic. That's called hooch. If it doesn't smell like acetone, you can stir it back in for a nice sourdough flavor, or you can pour it off and replace the liquid with an equal amount of filtered water.
Regular feeding keeps your starter happy and prevents sourdough starter troubleshooting concerns like mold or an overly acidic aroma. If your starter smells like acetone or develops mold, discard and contact us to buy some more Nonna Bella Dehydrated Sourdough Starter.
The Beauty of Wild Yeast Fermentation
Sourdough fermentation not only improves the texture and flavor but also offers health benefits. For diabetics, sourdough fermentation leads to a lower glycemic index compared to standard bread.
Benefits of Sourdough Fermentation:
- Digestibility: The fermentation process breaks down gluten, making sourdough easier on the digestive system.
- Nutrient Absorption: Fermentation significantly improves the availability of nutrients in the bread.
- Longer Shelf Life: The acidity generated helps maintain freshness for days.
Getting Started with Baking Sourdough Bread
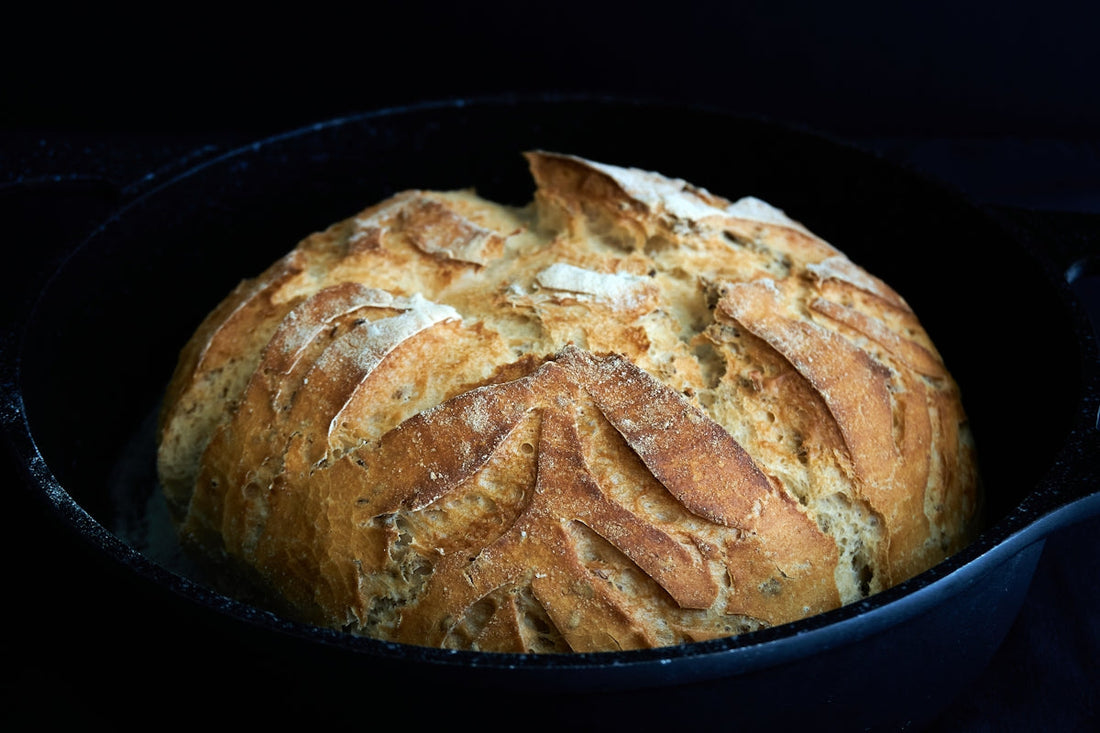
Crafting the perfect loaf involves careful attention to detail, from shaping dough to scoring and baking. Here's an easy sourdough bread recipe to hone your artisan skills.
Easy Sourdough Bread Recipe
Ingredients:
- 1 cup sourdough starter (active and bubbly) (100 g)
- 1 1/2 cups warm water (350 g)
- 4 cups organic flour (450 g)
- 2 tsp salt (10 g)
Instructions:
- Mix: Combine the warm water with the starter in a large bowl. Gradually add in the flour and salt, mixing with a Danish Dough Whisk. Knead until a smooth dough forms.
- Rise: Cover the bowl and let the dough rise at room temperature until it doubles in size.
- Shape: Punch down the dough, transfer to a surface, and shape into a round. Use a Reusable Silicone Bread Sling for easy transfer.
- Bake: Preheat your oven with a Le Creuset Dutch Oven. Place the dough inside and bake at 450°F for 20 minutes with the lid on, then 25 minutes uncovered for a crispy sourdough crust.
- Cool: Let your loaf cool on a rack before slicing.
Artisan Sourdough Tips and Tools
Sourdough Baking Tips:
- Hydration Levels: Adjust for humidity in your location to perfect the dough’s consistency.
- Scoring Techniques: Use a sharp bread slicing knife from a Professional Baking Tools set to score designs for expansion and beauty.
Storage and Maintenance
Ensure your sourdough starter remains viable by following proper storage techniques. When stored in the fridge, the starter can be fed weekly, preserving its viability for when you're ready to bake again.
Troubleshooting and Common Sourdough Mistakes
Sourdough Bread Troubleshooting:
- Dense Loaf: Check hydration levels and ensure the starter is active.
- Gummy Texture: Extend the baking time and check the oven temperature.
Apart from bread, expand your sourdough adventures with sourdough discard recipes such as pancakes or sourdough bagels.
Sourdough Bread: A Worldwide Legacy
From rustic loaves to Italian sourdough bread variants, the tradition of sourdough expands globally. Whether you’re preparing a sourdough pizza dough or exploring best sourdough scoring techniques, the journey with this ancient bread never ceases to amaze.
Conclusion
There’s unparalleled joy in crafting your own sourdough. The process, from fermentation to the final bake, envelops a singular connection between baker and bread. Ready to embark on your sourdough journey? Dive into the world of wild yeast and make every moment count. For more resources and tools for your baking adventures, visit the shop.
Happy Baking!
